The Battle of Powell River
The Battlefield
Armies don't want to fight if they don't have to, and when setting up for a battle (that is not a historical scenario), I have to consider whether either side can achieve their objective by avoiding a fight. This helps to define where and how the armies meet. In the Battle of Powell River (part of the ongoing Sneedville Campaign) I'm going to come up with a few possibilities based on the provided orders, and roll to see how the deployment turns out.
Knoxville's orders are to retake Chuckville (formerly Sneedville). In order to do this, they must continue marching forward -- they have the burden of attack. Once they rendezvous with the Tazewell Battalion at the crossroads near Brook's Bridge, their most likely (and fastest) route is to continue marching down Highway 63, marked as Red-1 on the deployment map below. However, if they spy Kingsport forces committed along that path, they have the option of crossing through the Coleman Gap and taking a more southernly route (Red-2 and Red-3) to try to bypass a fight. This is not likely to work (though it would change the battlefield), so route 1 will be the most heavily weighted.
Kingsport's orders, on the other hand, involve keeping Knoxville away from Chuckville. They could technically do this by sitting just outside of Chuckville, but they have been ordered to do it by marching deeper into Knoxville territory (this could pin down Knoxville's forces, allowing Roger's Division to cut off the supply route to the Harlan Blitz). However, they don't have to march full speed in order to accomplish this, and there may be reasons to hang back a bit. First of all, the location immediately around the bridge where the two armies would potentially clash is heavily wooded, and not suitable to deploying any troops, especially artillery and cavalry. Secondly, the possibility of Knoxville using one of the other two routes might caution against going too far down one, in case they have to turn around. Thirdly, General Patton is described as "slow to move".
Thus I have determined 3 possible deployment locations for Kingsport (Blue-1, Blue-2, Blue-3): Zone 1 contains the most open ground for cavalry charges (though some is unplowed and rather rocky and rough), zone two is less open, but contains an opportunity to set up a crossfire, as well as a "big hill" that could be defended. Zone 3, which Jon recommends, is the most aggressive and has a bit of open ground around the Baptist church, but is also heavily wooded so I've weighted it the least.
 |
| Possible Deployment Strategies |
Rolling the dice, I discover that Knoxville does indeed follow path 1 as expected, and once Kingsport is certain of this, they choose to only advance as far as zone 2. Kingsport's plan here is just to set up a defensive arc along the crescent-shaped hill and let the "big hill" form an impassible chokepoint. One flank is anchored on the river, while the other is protected by skirmishers in a wooded ravine. Let Knoxville try to crack that nut. Note that there is also a ford in Zone 2 (Fulgate Ford), and I would let Kingsport's light troops (rifles or dragoons) use it, except that it doesn't play in to their strategy for this battle, which requires the light troops to guard the ravine in the south.
 |
| Topographic map of Zone 2, showing a ford. |
 |
| Google Earth, showing the battlefield. |
 |
| A closer, lower view of the center of the battlefield. |
The Units
Knoxville's Pine Division, under Gen. Stiner was setup into two brigades:
- A Cavalry Brigade containing the Barbourville Dragoons and the 2nd Evarts Lancers (4 bases),
- An Infantry Brigade containing the Pineville and Middlesboro line as well as the Cumberland and Harrogate artillery (a total of 6 bases).
- The Tazewell Battalion (aka "the Orphans") is not brigaded, but is initially commanded directly by Stiner. Since it arrived early, it advanced to the big hill to provide reconnaissance.
Kingsport's Jones Division, under Gen. Patton had slightly more forces, and so was setup into three brigades:
- An Advance Guard containing the Surgoinsville Rifles and the Pennington Dragoons (3 bases),
- A Main Column consisting of the 1st and 2nd Virginia Line, and the 1st and 2nd Big Stone Gap Artillery (6 bases),
- A Cavalry Reserve consisting of the 1st and 2nd Duffield Lancers (4 bases).
The Battle
I've been busy, and had very little time to play this battle (which occurred across three evenings), so I probably missed a few rules in my haste, especially regarding various terrain types and skirmishers. In fact, this table (or rather, half-table) is quite a mess, and doesn't adequately depict all the terrain in the region (e.g. some areas such as the crescent hill should be lightly wooded, which I don't depict. This is only a problem if close order cavalry attempts to move over it, which I don't do). I also lost track of the turn number at least twice, so I'm not sure exactly how long this battle lasted. Perhaps around four hours.
 |
| Initial deployment |
Approximately the first 2-3 hours or so of the battle (~4-6 turns) consisted of initial deployment followed by an artillery duel along the road and some heavy skirmishing in the wooded ravine south of the crescent-shaped hill. Kingsport doesn't advance since they don't have the burden of attack. But Knoxville is unwilling to commit it's troops into the crossfire and is hoping its artillery and skirmishers can soften them first. Of note, the Tazewell Battalion engaged in some fire across a ravine with some detachments of the Surgoinsville Rifles, who eventually won the upper hand.
 |
| Extended skirmishing action in the south. Artillery duel along the road in the north. |
Eventually, Knoxville's dragoons have some good fortune against Kingsport's advance guard, causing the Surgoinsville Rifles to pull back to guard the flank (see below) -- Kingsport's advance guard brigade has been exhausted and can no longer charge. This provides an opportunity for the rest of Knoxville's troops to attempt an assault. However, in the attempt, the Pineville Line eat a face-full of canister shot while being charged in the flank by the 2nd Virginia Line. This is enough to stall the attack by exhausting Knoxville's infantry brigade. General Stiner is forced to call for a withdrawal. I rolled to see if Kingsport continued pursuing beyond what is pictured, but they did not.
 |
| Knoxville attempts to assault the hill... |
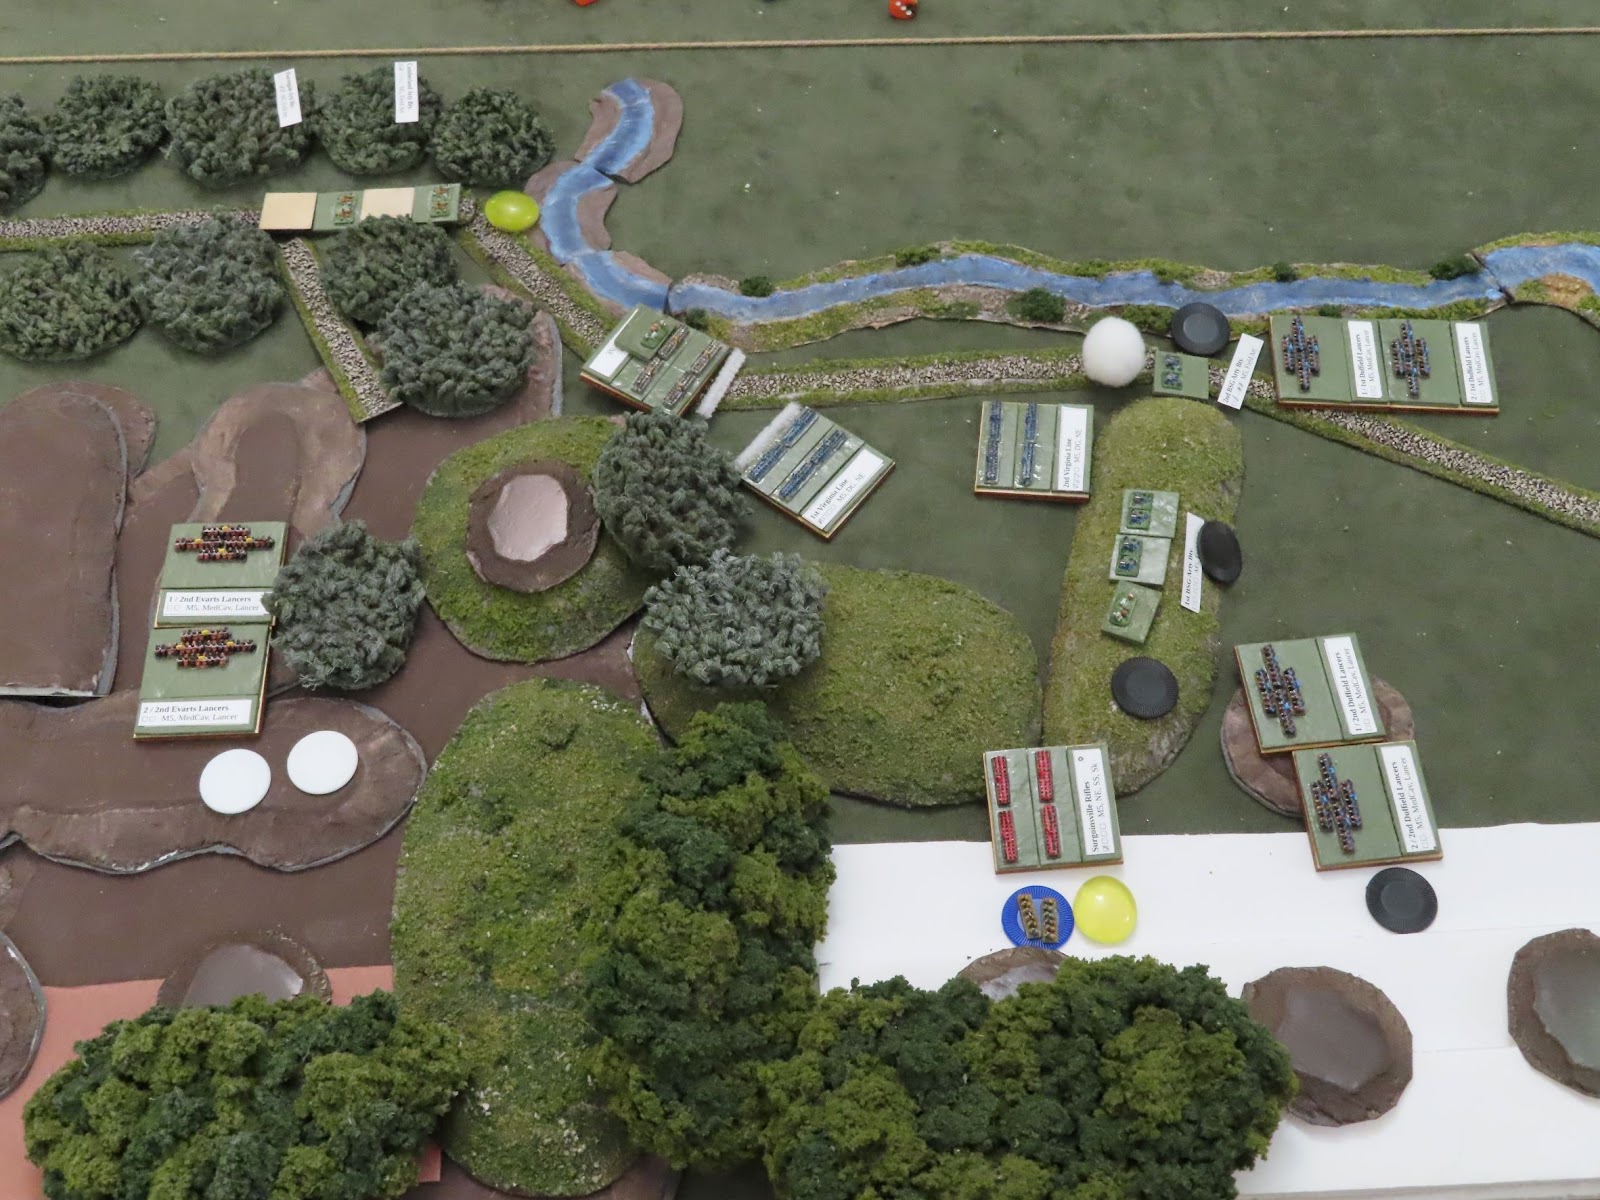 |
| But the assault fails and they are driven back. |
The Casualties
No fancy computations this time, just the fractions of units lost. I'll let Jon decide how to sort out the wounded from the dead. None of the Lancers saw combat, or suffered any losses, which isn't surprising in this terrain. The dragoons and artillery took pretty hard hits, though.
Knoxville
- Tazewell Battalion: 2/4
- Pineville Line: 4/8
- Middlesboro Line: 1/8
- Barbourville Dragoons: 2/8
- Cumberland Artillery: 2/8
- Harrogate Artillery: 2/8
Kingsport
- Surgoinsville Rifles: 1/8
- 1st Virginia Line: 1/8
- 2nd Virginia Line: 3/8
- 2nd Big Stone Gap Artillery: 3/8
- Pennington Dragoons: 3/8
Comments