Posts

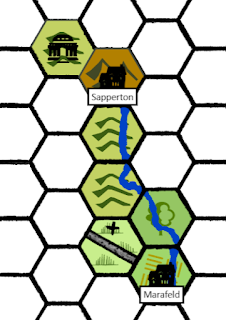
Solo RPG Campaign - 1. Mara's Vineyard
Image
Disclaimer: This first session contains a lot of Mythic GME rolls, and very little in the way of BFRPG rolls (mostly just a few wandering monster checks and reaction rolls). That's fine, because I'm using it to flesh out the setting. There will be more actual game rolls in the next post. Day 1 I started off my party in the classic common room of an anonymous inn/tavern in an unknown town, with no idea what they would be doing. I needed to overhear some rumors. For this, I turned to the Mythic GME, which responded with the following prompts: who?  foolish , what?  broken , where?  resourceful , and why?  transport . This could be interpreted several ways, but to my mind, this meant a foolish merchant had been transporting resources, and a wagon had broken. Perhaps sabotage? Or a raid on a trade shipment? Where there bandits in the area? I rolled a direction the shipment was heading: NW. I found a list of trade goods in BFRPG's Equipment Emporium and rolled to discove...

Solo RPG Campaign - 0. Rules and Characters

Back last year (Fall of 2023) I started a solo RPG campaign, around the same time that Jon Mollison began his solo AD&D campaign . Unfortunately, I didn't get very far into it before I found myself too busy to continue. Only now (February 2024) am I getting around to picking it back up again -- more on that later, but I've only just played a third session, while Jon has already completed 50, and has already partially back-burnered the project for newer things. For now, I'm going to retroactively describe where I started, eventually working up to the present. Rules At the time I started, my ruleset of choice was Basic Fantasy RPG (BFRPG) which is a great little ruleset that is easily comprehended (and is free). In order to play it as a solo hexcrawl, I used the Hexcrawl Adventures supplement available of the BFRPG forums. Specifically, this contains random terrain charts that base the next hex's terrain on the current hex's terrain. On top of that basic chassis...

Rise of the Orc Lords - AAR

Image
Signup Through late November and into December, I participated in Mr. Wargaming's fantasy Braunstein/Kriegsspiel exercise, Rise of the Orc Lords . This initially came as somewhat of a surprise to me. True, I had expressed a passing interest a month earlier, but hadn't thought that I'd explicitly signed up. After all, my other hobby is early music, and as a result, my discretionary time in early December is largely taken up with rehearsals and performances, as well as various church activities. The first full week in December is typically one of the busiest of the year for me. I was also a bit intimidated by the other ( elite-level! ) players. I get the impression they all knew each other and had all played together in various #BROSR activities. I felt very much the outsider. I almost backed out, but decided to stick to the course and just see what happened. After all, if I got eliminated early, it was no skin off my back. Just surviving to the end would be an accomplishment...

The Battle of Powell River

Image
The Battlefield Armies don't want to fight if they don't have to, and when setting up for a battle (that is not a historical scenario), I have to consider whether either side can achieve their objective by avoiding a fight. This helps to define where and how the armies meet. In the Battle of Powell River (part of the ongoing Sneedville Campaign) I'm going to come up with a few possibilities based on the provided orders, and roll to see how the deployment turns out. Knoxville's orders are to retake Chuckville (formerly Sneedville). In order to do this, they must continue marching forward -- they have the burden of attack. Once they rendezvous with the Tazewell Battalion at the crossroads near Brook's Bridge, their most likely (and fastest) route is to continue marching down Highway 63, marked as Red-1 on the deployment map below. However, if they spy Kingsport forces committed along that path, they have the option of crossing through the Coleman Gap and taking a more...

The Miracle of Big Stone Gap

Image
The best defense is a good offense. At least that's what the Big Stone Gap's High School coach used to say, before he got put in charge of the town's militia. Knoxville has sent a relatively small contingent (600 men, 750 horse) against Big Stone Gap, who is only defended by a militia of 200. While Mr. Wargaming played this out as a siege, using two different sets of rules, I wanted to see what advantage could be found in the mountainous terrain, and how that would translate to the table.  Dark Hollow is an extremely narrow passage through the mountain with only enough room for a road and a river. However, there is a small bend in the river where it widens just enough for our militia boys to throw up some hasty works and deploy in a firing line. This scenario is essentially a simplistic "tower defense", where you shoot down endless waves of oncoming of enemies. With no room to maneuver, the only real question to answer here is whose morale will hold out longer. In...

Battle of Morristown AAR

Image
Last time we looked at the setup for this battle, which rules I was using, and the selection of a battlefield. Without further ado, it's time to see what happens. By way of reminder, here is the disposition of the troops at 10:00 am. Kingsville goes first. Initial Deployment Turn 1 (10:00 to 10:30) Both troops continue maneuvering into position. I don't have skirmish stands (either infantry or cavalry) painted up yet, so I'm using the blue poker chips to represent skirmish detachments (you'll see the original unit stands off to the top left side of the table). Here the Greeneville Rifles have begun sending detachments to take the wooded hill, and the Rogersville Light Dragoons have broken down completely into skirmishers to pass through the woods unimpeded. The Knoxville commander, accompanied by the White Pine and Dandridge line regiments surveys the battlefield from the top of a windmill on a hilltop. End of turn 1 Turn 2 (10:30 to 11:00) The cavalry charge by the 1s...

Setup for the Battle of Morristown

Image
Introduction I'm dusting off this antique blogspot to publish some wargame reports for Mr. Wargaming's collaborative solo wargame campaign experiment: The Sneedville War . You can learn more about it over at his blog, and more importantly on his youtube channel . In short, the forces of Kingsport are keen on taking the town of Sneedville from the forces of Knoxville. Full disclosure: my sympathies lie with Kingsport, but of course I will do my best to game each side fairly and intelligently. The first two battles of the war are now ready to game. These are the Battle of Morristown, and the Siege of Big Stone Gap. After marching into Bean Station, Roger's Division (these forces are really too small to call "armies") has turned south to cross the bridge to Morristown. They are opposed by Knoxville's Division of the East, which is marching North to meet them. The forces are similar in power, but Roger's has the only artillery, and slightly more infantry -- i...